Account Management
Update:
1. Instructions for use
1.1 Description One
- Account management is to assign users to organization unit; if you want to assign project authority to users of organization unit, please go to the [Authority Management] page
- Only Management account and OU Management account can view the [Account Management] page, and non-administrator roles can ignore this page;
1.2 Description two
- In [Account Management-Accounts to be reviewed], you can review the accounts that apply to join the company and assign organization unit to them;
- Set the user as Management accoun in [Account Management-Existing Account] or [Account Management-Account Pending Audit];
- In [Account Management-Existing Account], you can view and modify all the company’s accounts and the ou management account where the account is located;
- In [Account Management-Existing Account], users can be invited to the enterprise;
- Users can be deleted in [Account Management-Existing Account];
2. Account Management
2.1 assign account
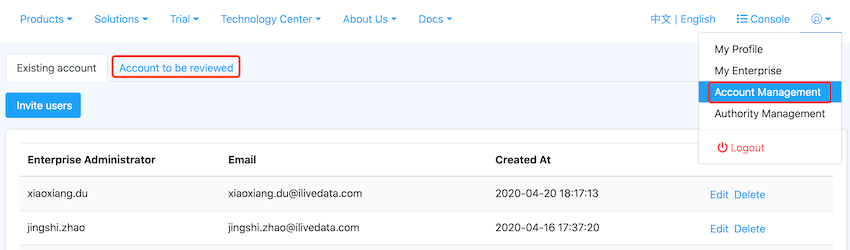
step1: Log in to the official website of LiveData, select the [Account Management] category under the avatar, and enter the account management page (you can also enter the page through the review link in the email); click [Account pending review] to enter the review page in.
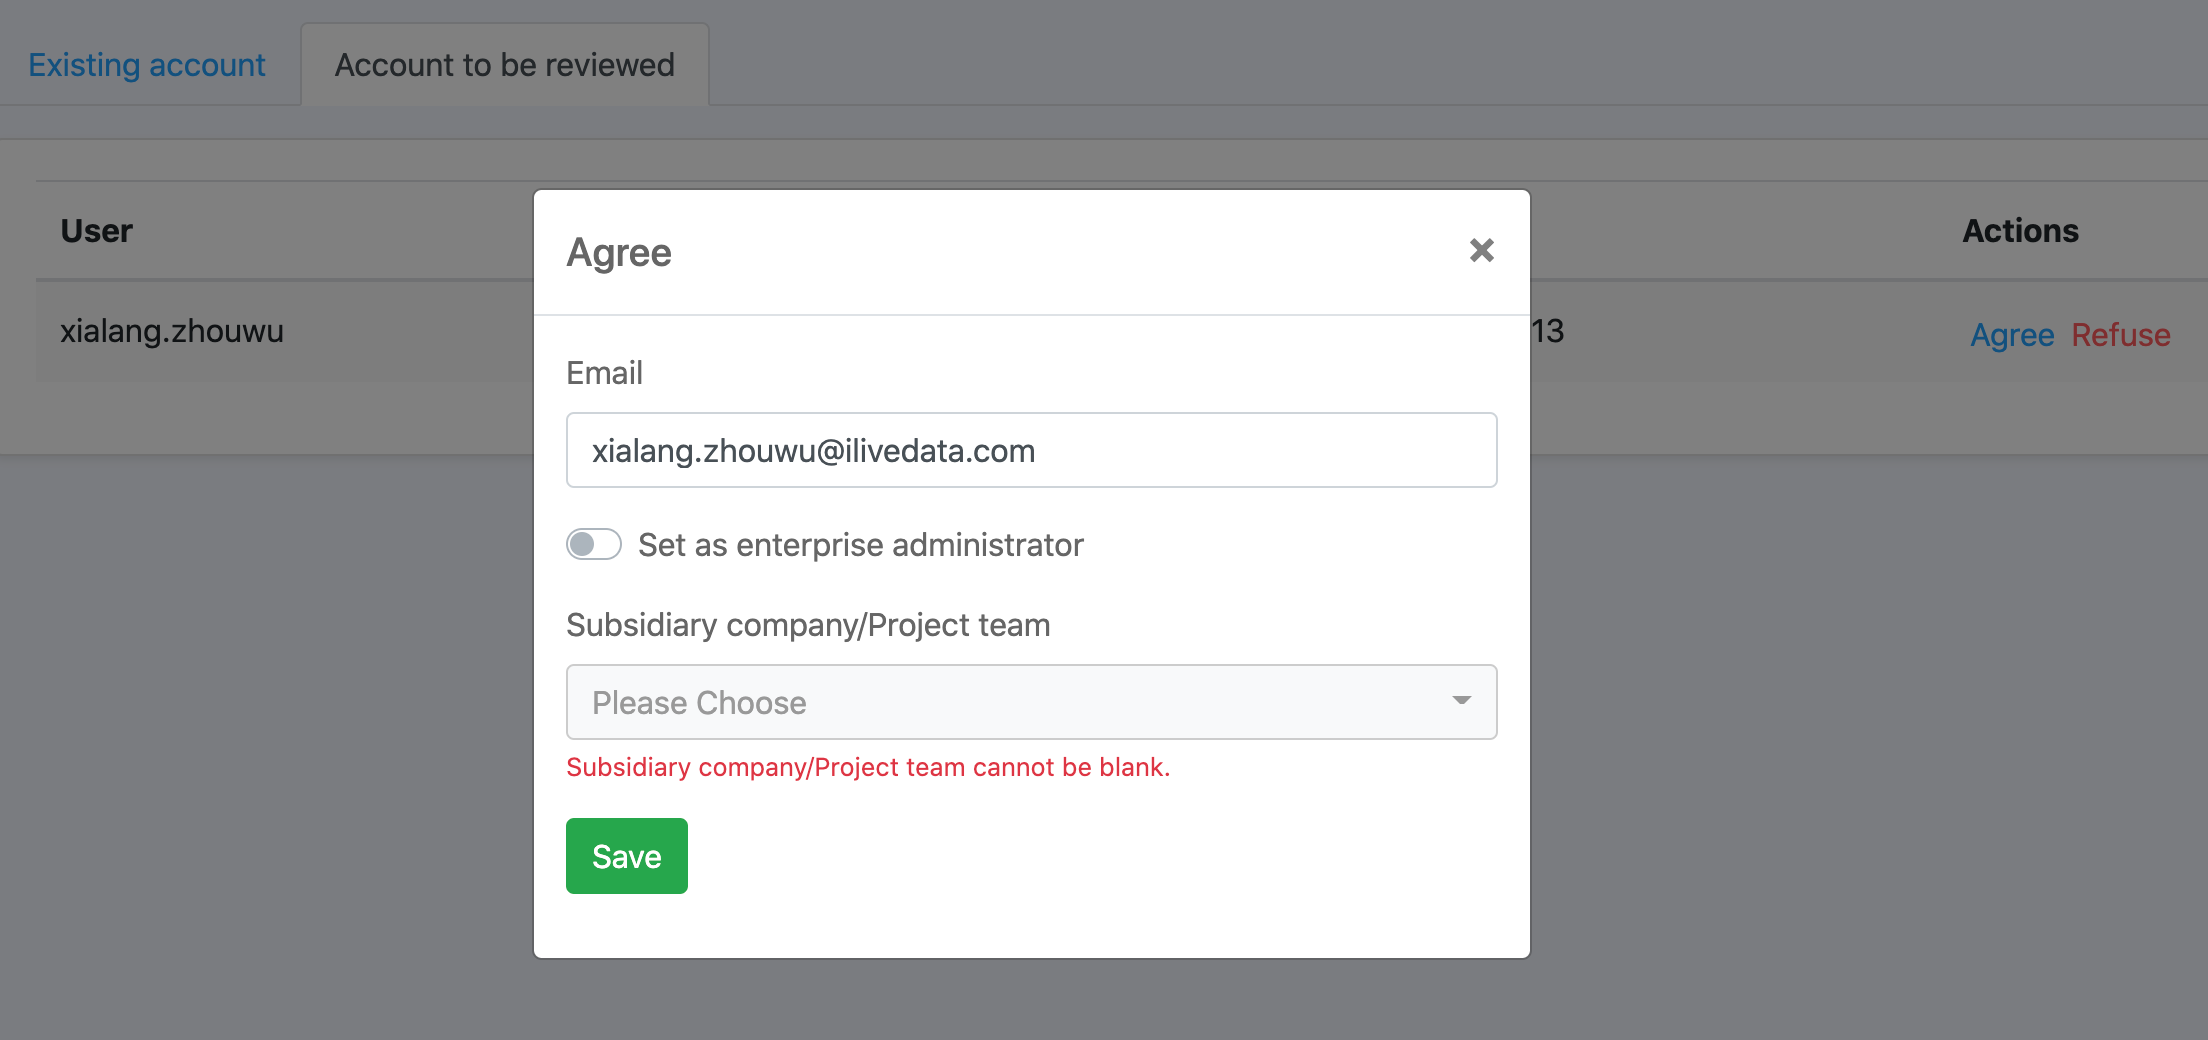
step2: If you agree the user to join your company, you need to assign the user to at least one ou organization unit (if you set the user as a management account, you do not need to assign the user to a ou organization unit);
step3: After assigning a subsidiary to the user, please go to the [Authority Management] page to assign authority;
2.2 Set user as enterprise administratory
step1: In [Account Management-Existing Account], click Modify, and a modify pop-up window will appear;
step2: Click set as enterprise administrator, and click the “update” button, then the setting is successful;

2.3 Modify the subsidiary/project group to which the user belongs
step1: In [Account Management-Existing Account], click Modify, and a modify pop-up window will appear;
step2: Modify the subsidiary/project group to which the user belongs, and click the “Update” button, then the modification is successful;
2.4 Invite users
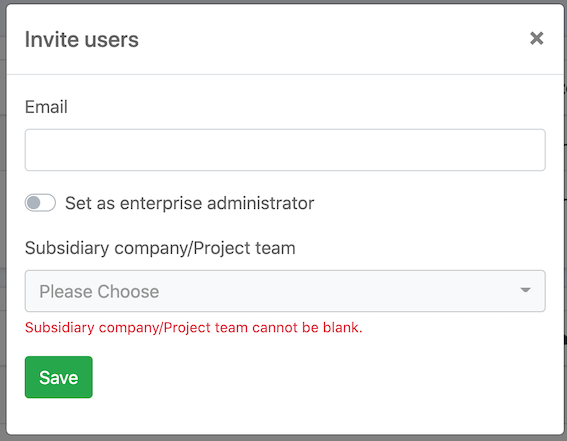
step1: In [Account Management-Existing Account], click Invite User, a pop-up window for inviting users will appear;
step2: Follow the prompts, fill in the user’s mailbox, select the subsidiary to which the user belongs, and click Save, and an email will be sent to the user (ps: If the user has not registered, you need to click the activation link within 24 hours;
2.5 Delete user
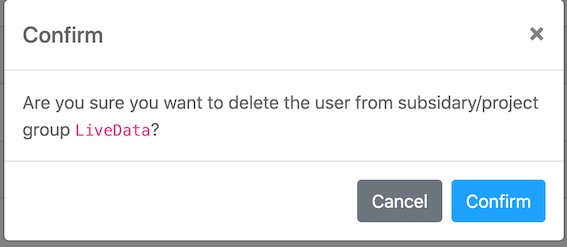
In [Account Management-Existing Account], after clicking Delete, a pop-up window will appear, after confirming, delete the user from the enterprise
1. Instructions for use
1.1 Description One
- Account management is to assign users to organization unit; if you want to assign project authority to users of organization unit, please go to the [Authority Management] page
- Only Management account and OU Management account can view the [Account Management] page, and non-administrator roles can ignore this page;
1.2 Description two
- In [Account Management-Accounts to be reviewed], you can review the accounts that apply to join the company and assign organization unit to them;
- Set the user as Management accoun in [Account Management-Existing Account] or [Account Management-Account Pending Audit];
- In [Account Management-Existing Account], you can view and modify all the company’s accounts and the ou management account where the account is located;
- In [Account Management-Existing Account], users can be invited to the enterprise;
- Users can be deleted in [Account Management-Existing Account];
2. Account Management
2.1 assign account
step1: Log in to the official website of LiveData, select the [Account Management] category under the avatar, and enter the account management page (you can also enter the page through the review link in the email); click [Account pending review] to enter the review page in.
step2: If you agree the user to join your company, you need to assign the user to at least one ou organization unit (if you set the user as a management account, you do not need to assign the user to a ou organization unit);
step3: After assigning a subsidiary to the user, please go to the [Authority Management] page to assign authority;
2.2 Set user as enterprise administratory
step1: In [Account Management-Existing Account], click Modify, and a modify pop-up window will appear;
step2: Click set as enterprise administrator, and click the “update” button, then the setting is successful;
2.3 Modify the subsidiary/project group to which the user belongs
step1: In [Account Management-Existing Account], click Modify, and a modify pop-up window will appear;
step2: Modify the subsidiary/project group to which the user belongs, and click the “Update” button, then the modification is successful;
2.4 Invite users
step1: In [Account Management-Existing Account], click Invite User, a pop-up window for inviting users will appear;
step2: Follow the prompts, fill in the user’s mailbox, select the subsidiary to which the user belongs, and click Save, and an email will be sent to the user (ps: If the user has not registered, you need to click the activation link within 24 hours;
2.5 Delete user
In [Account Management-Existing Account], after clicking Delete, a pop-up window will appear, after confirming, delete the user from the enterprise